USING THIS GUIDE DOES NOT REQUIRE YOU TO HAVE AN ACTIVE INTERNET CONNECTION, THIS PROGRAMMING GUIDE IS BASED ON THE MODEM’s INTERNAL WEB BROWSER PAGE.
This guide is only for GTEN® Model 4 series devices. (CR400R, 4GAS V1, V2, V3, V3A, V4 and DYNAMI 2/3/4)
To get started, make sure your GTEN® modem is powered up and displaying a green Wi-Fi light in the front panel of the device. This light should be blinking once you have established a wireless connection.
Follow the steps listed below to set your APN:
Step 1. Make sure your computer/device is connected to the GTEN® Internet device.
Step 2. Open an up an Internet browser on your computer such as Google Chrome.
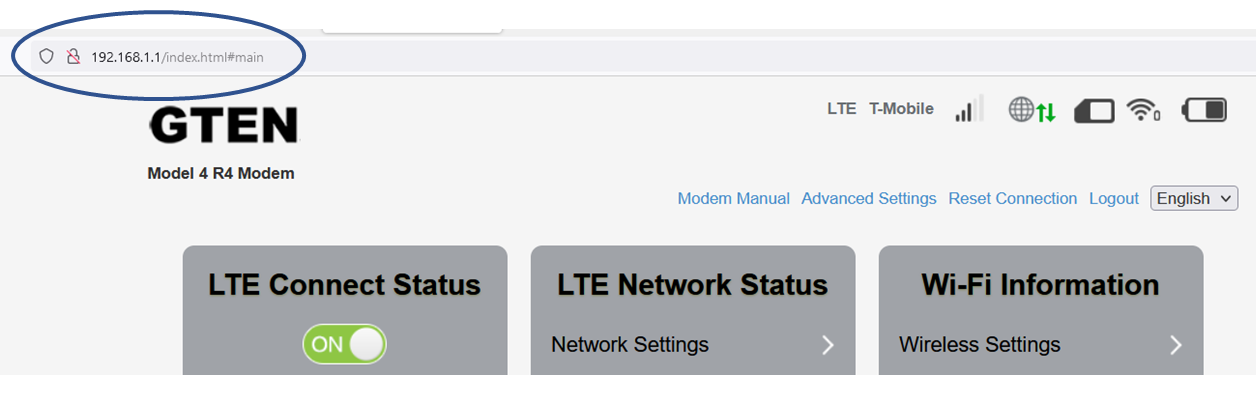
Step 3. Type in the following information in the URL section of the web browser, 192.168.100.1 or 192.168.1.1 and then hit enter. (See Example – Click on picture to make larger if necessary.):
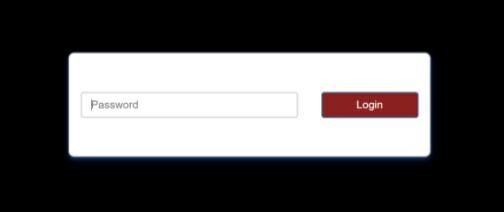
Step 4. Enter the password to access the modem, The default password is the word “admin”. (See Example – Click on picture to make larger if necessary.):
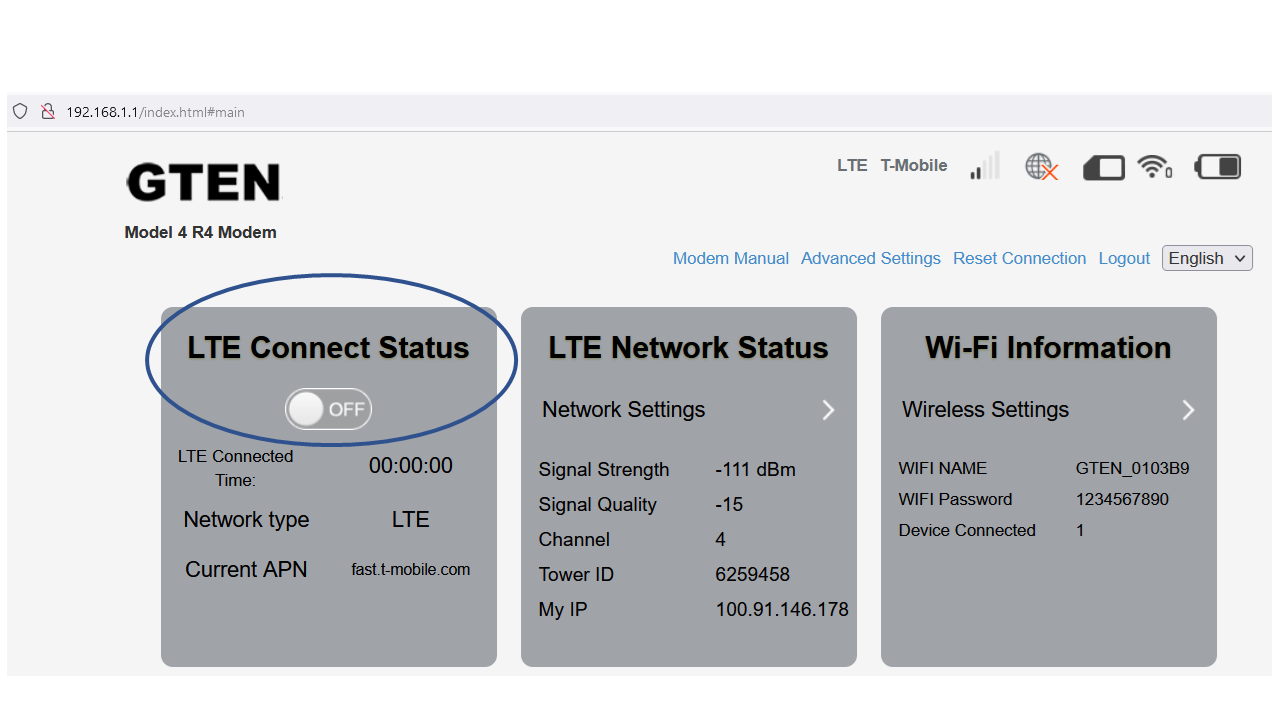
Step 5. You will now be at the GTEN® modem web home page, now look for a section that says LTE CONNECTION STATUS, in the box you will be able shut off any active LTE connections, this is required so you can make changes to the device. (See Example – Click on picture to make larger if necessary.):
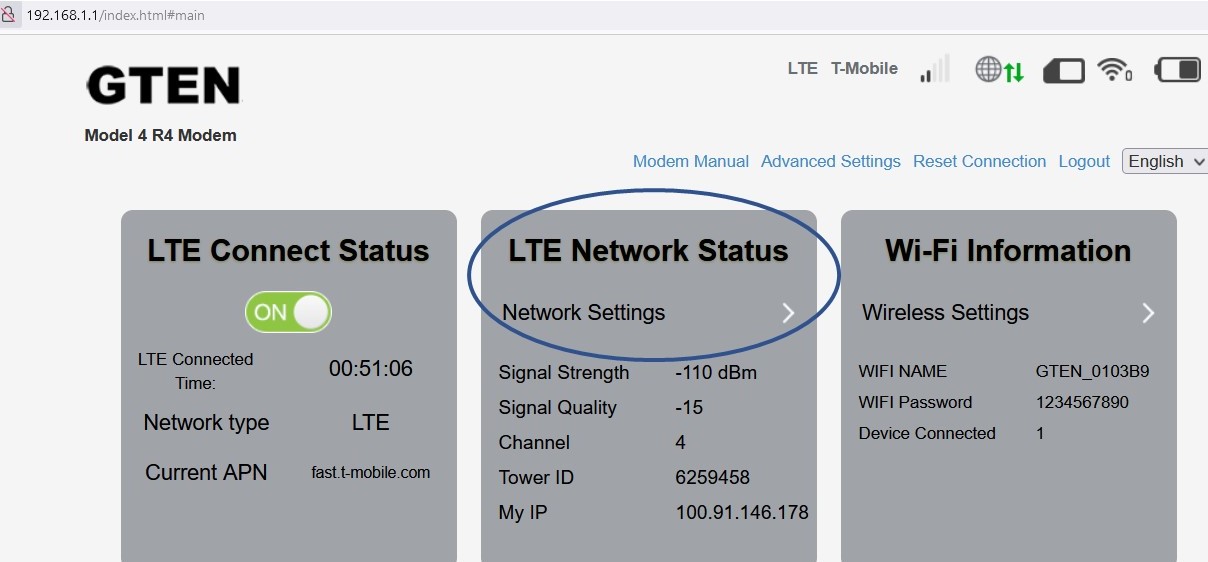
Step 6. Now continue on the device home page and look for a section that says LTE NETWORK STATUS, in that section you will be able to find the link to update your settings, click on the NETWORK SETTINGS link to continue. (See Example – Click on picture to make larger if necessary.):
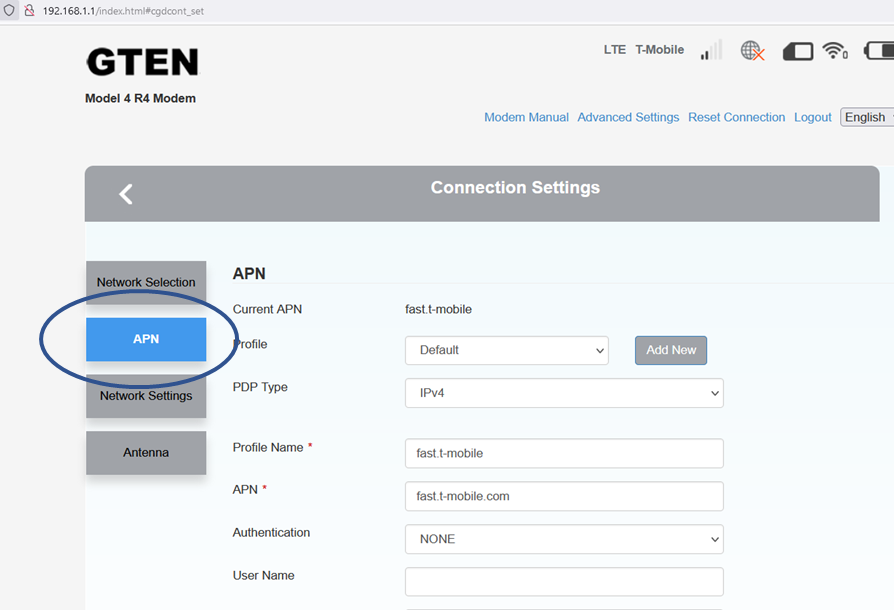
Step 7. After you click on the NETWORK settings link above, you will now have access to the connection settings menu, now click on the APN button.(See Example – Click on picture to make larger if necessary.):
Step 8. Click on the ADD NEW button. (See Example – Click on picture to make larger if necessary.):
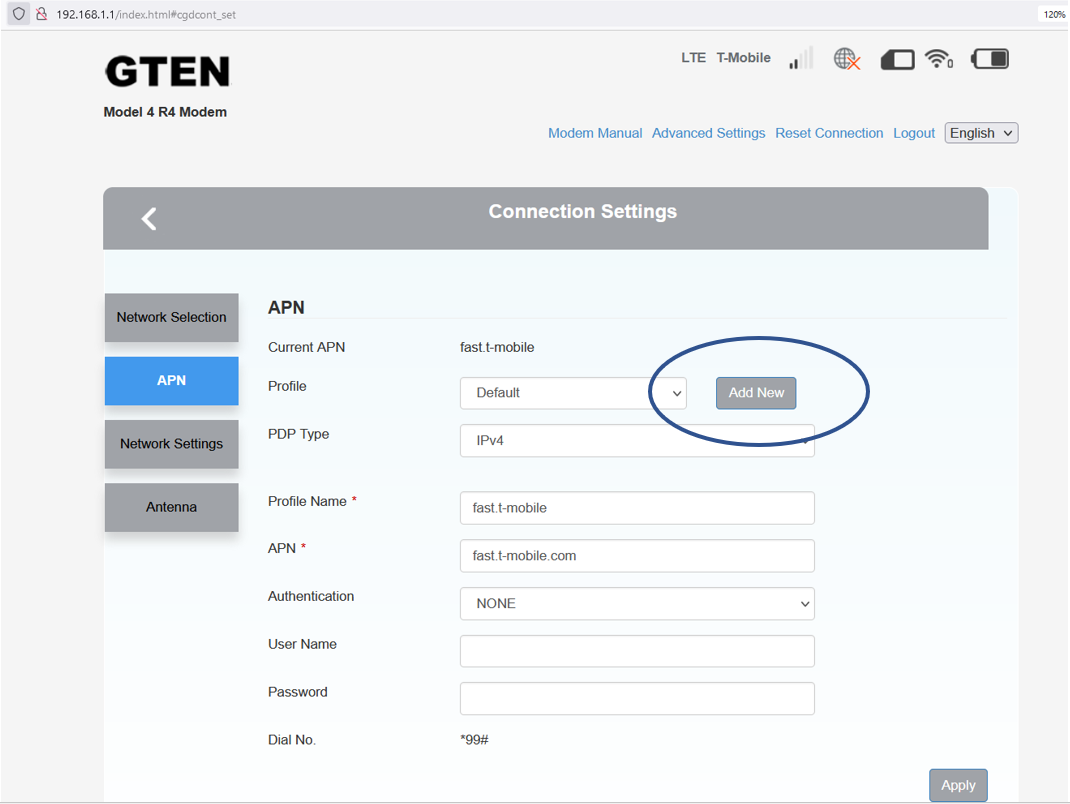
Step 9. Now enter the information for your new APN profile. (See Example – Click on picture to make larger if necessary.):

CARRIER APN LIST REQUIRED INFORMATION LISTED BELOW. UPDATED LIST 03/11/2022
DO NOT GUESS YOUR APN INFORMATION, Failure to apply the correct APN will cause your device not to work. (If you do not know what your APN setting should be, reach out to our team and we'd be happy to let ya know!)
Plan and Carrier | PDP Type | Profile name | APN | Authentication |
Blue Basic on the AT&T Network | IPv4 | ATT | broadband | NONE |
Pink Max on the T-Mobile Network | IPv4 | TMOS | b2b.static | NONE |
Pink Basic on the T-Mobile Network | IPv4v6 | FAST | fast.t-mobile.com | NONE |
Red Basic on the Verizon Network | IPv4 | VZW | vzwinternet | NONE |
Step 10. Now click on the APPLY button on the bottom right hand of the current page: (See Example – Click on picture to make larger if necessary.):
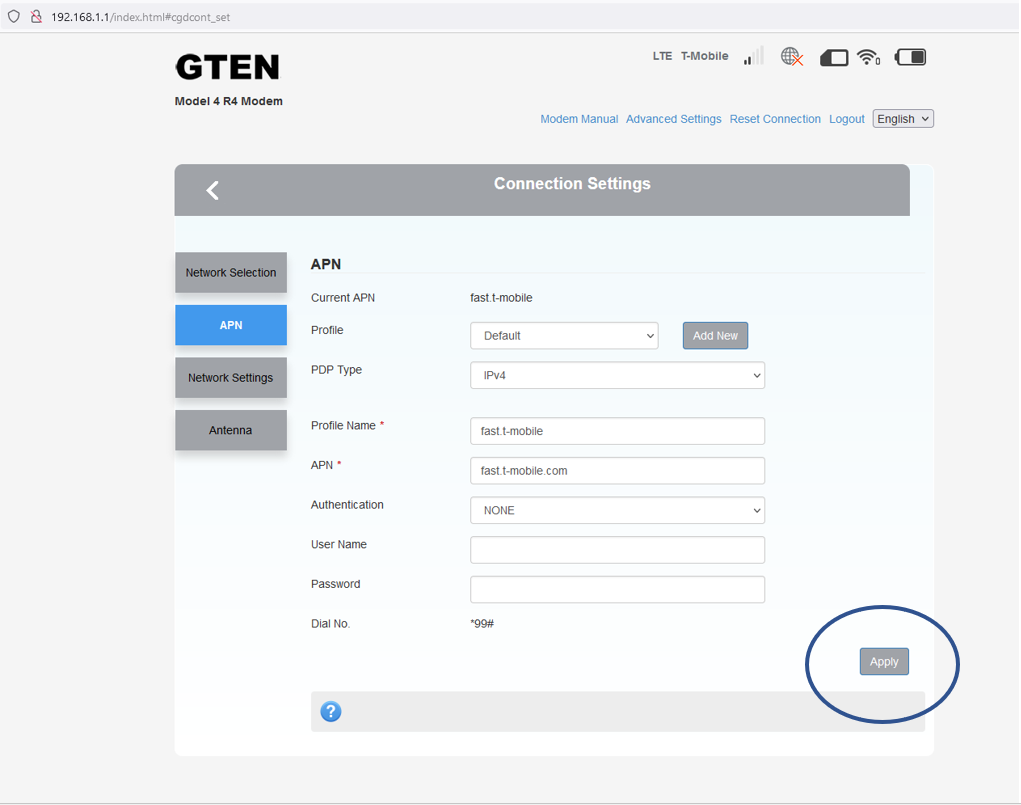
YOU WILL SEE A SUCCESS MESSAGE ON YOUR SCREEN and your APN setup has been completed.
You may now power cycle (reboot) your device or click on the reset connection link towards the top of the webpage.
DO NOT CLICK ON THE MODEM PHYSICAL RESET BUTTON AS THIS WILL WIPE OUT ALL OF YOUR WORK YOU JUST DID.